How to get the most out of 6 Essential Standing Yoga Poses
Some of the most “basic” or essential yoga poses are not actually the most complicated of asanas. However, subtle and specific linguistic cues can make a tremendous difference in how you personally, individually experience a pose. You know how someone giving you a compliment can transform your day? One little bit of helpful language can also transform your yoga pose, targeting just the areas that YOU need to target. Here, I will give you my favorite tips and tricks for Warrior I, Warrior II, High Lunge, Triangle, Extended Side Angle, and Tree Pose.
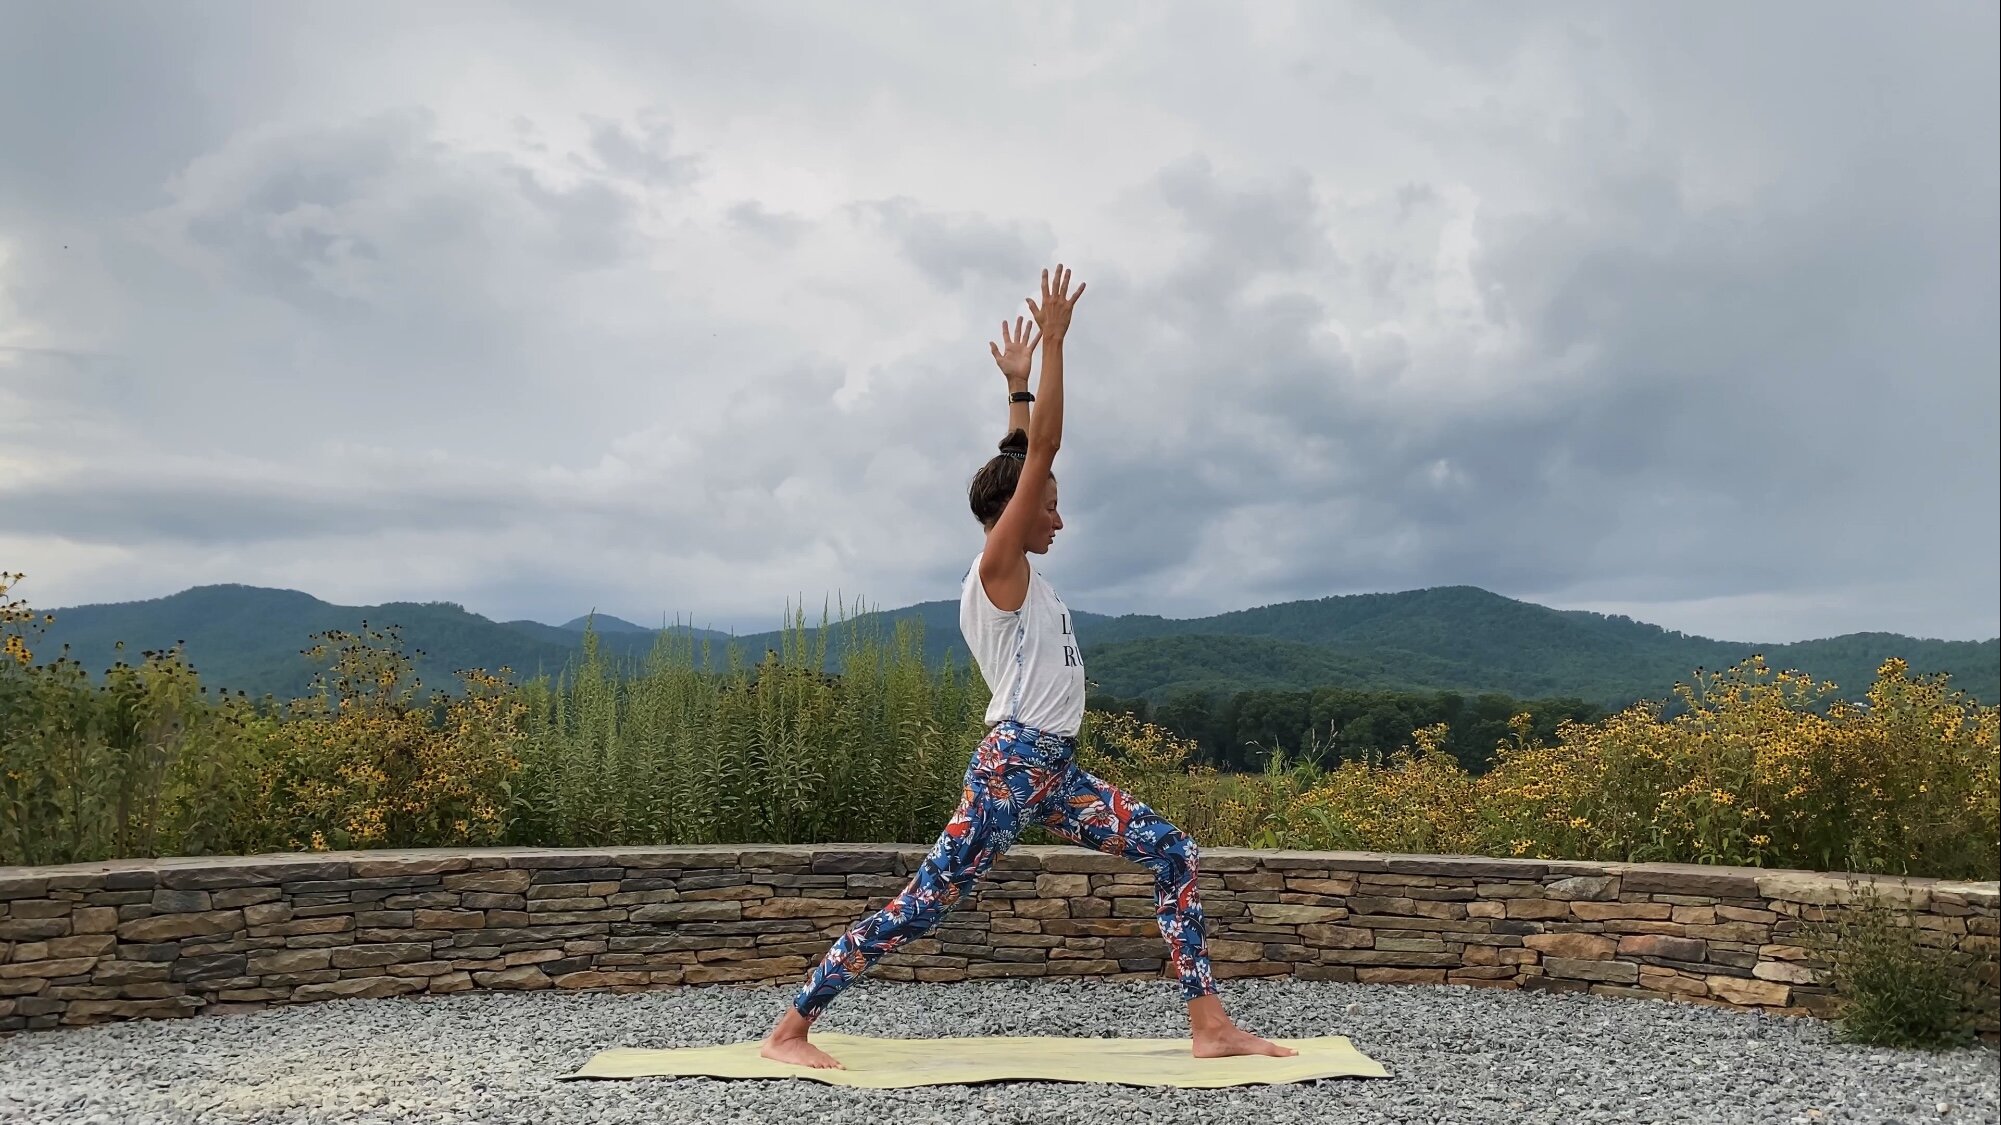
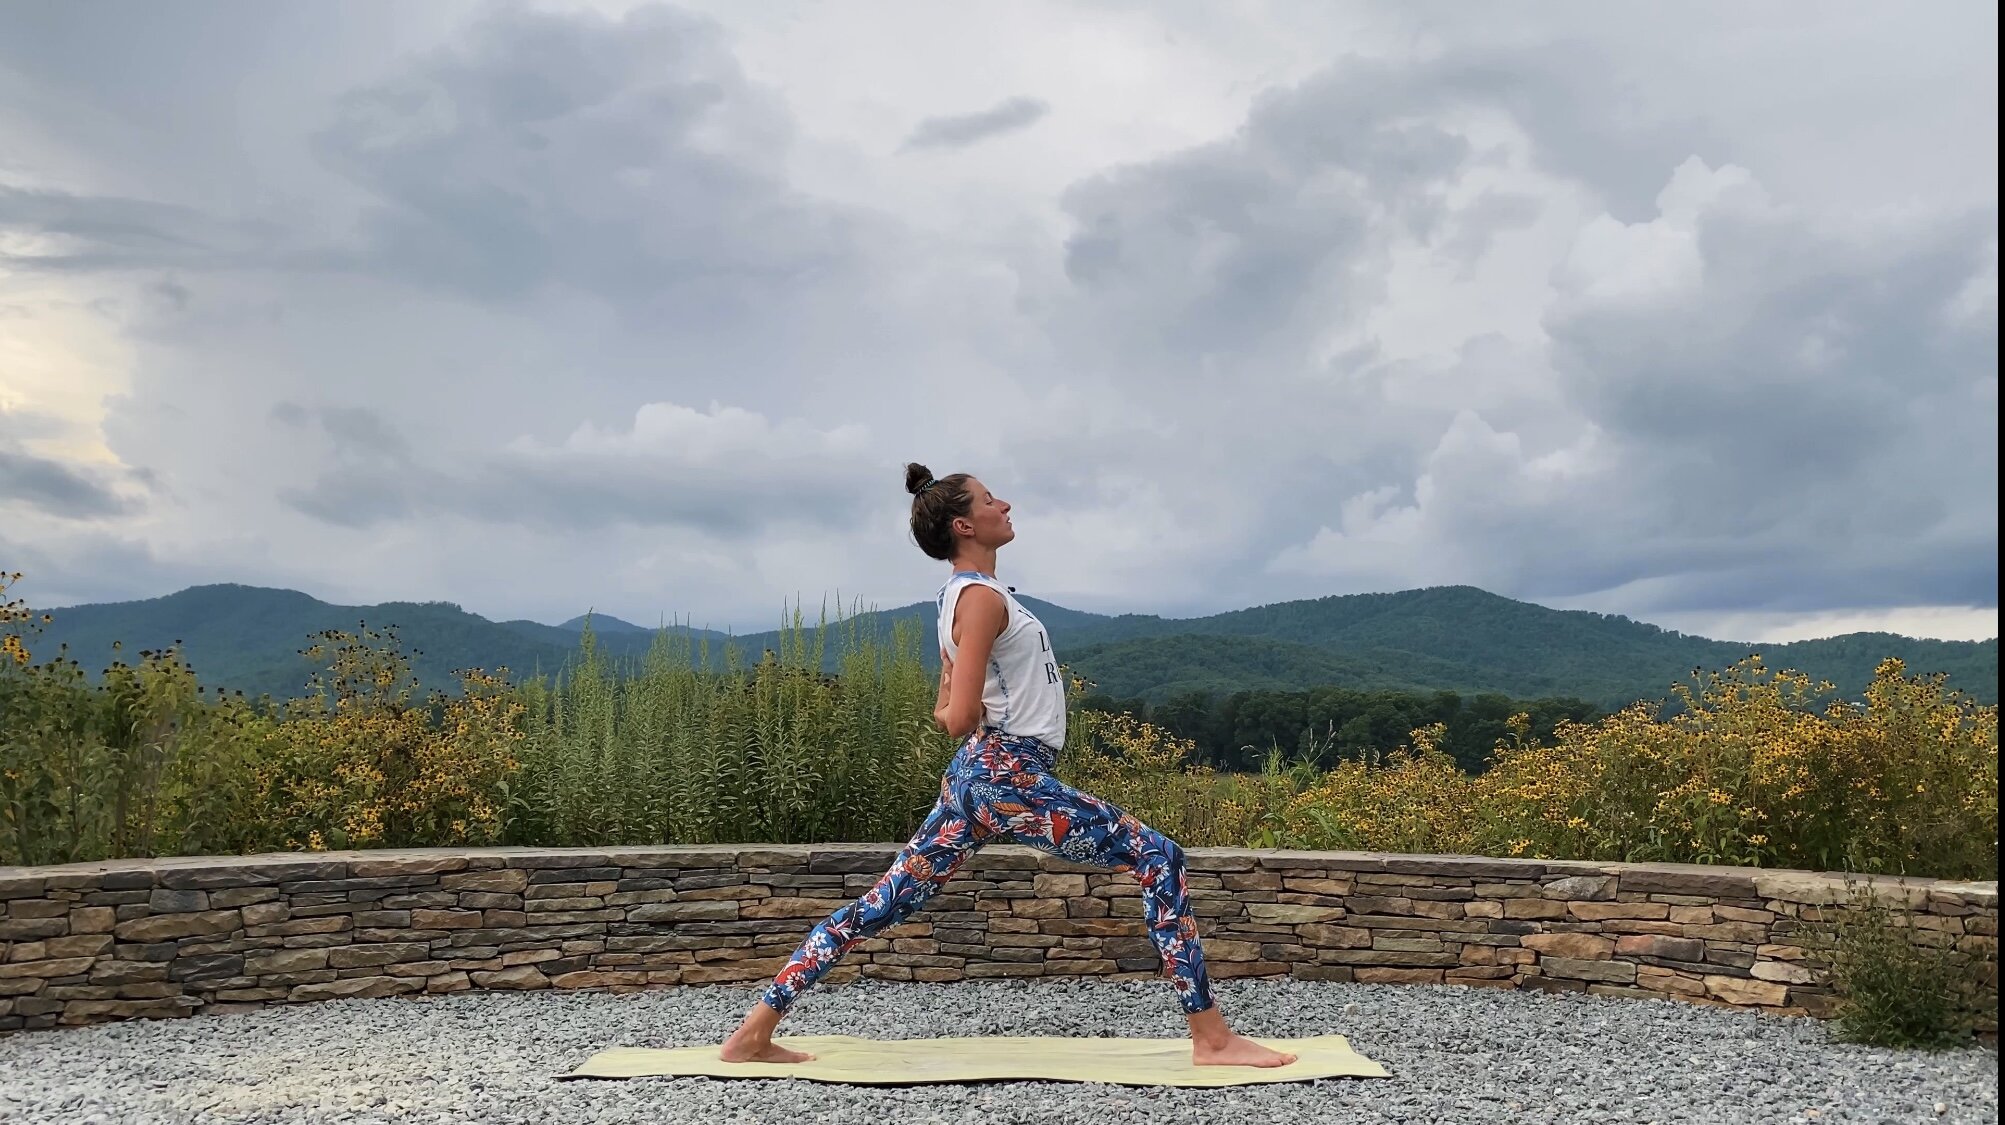
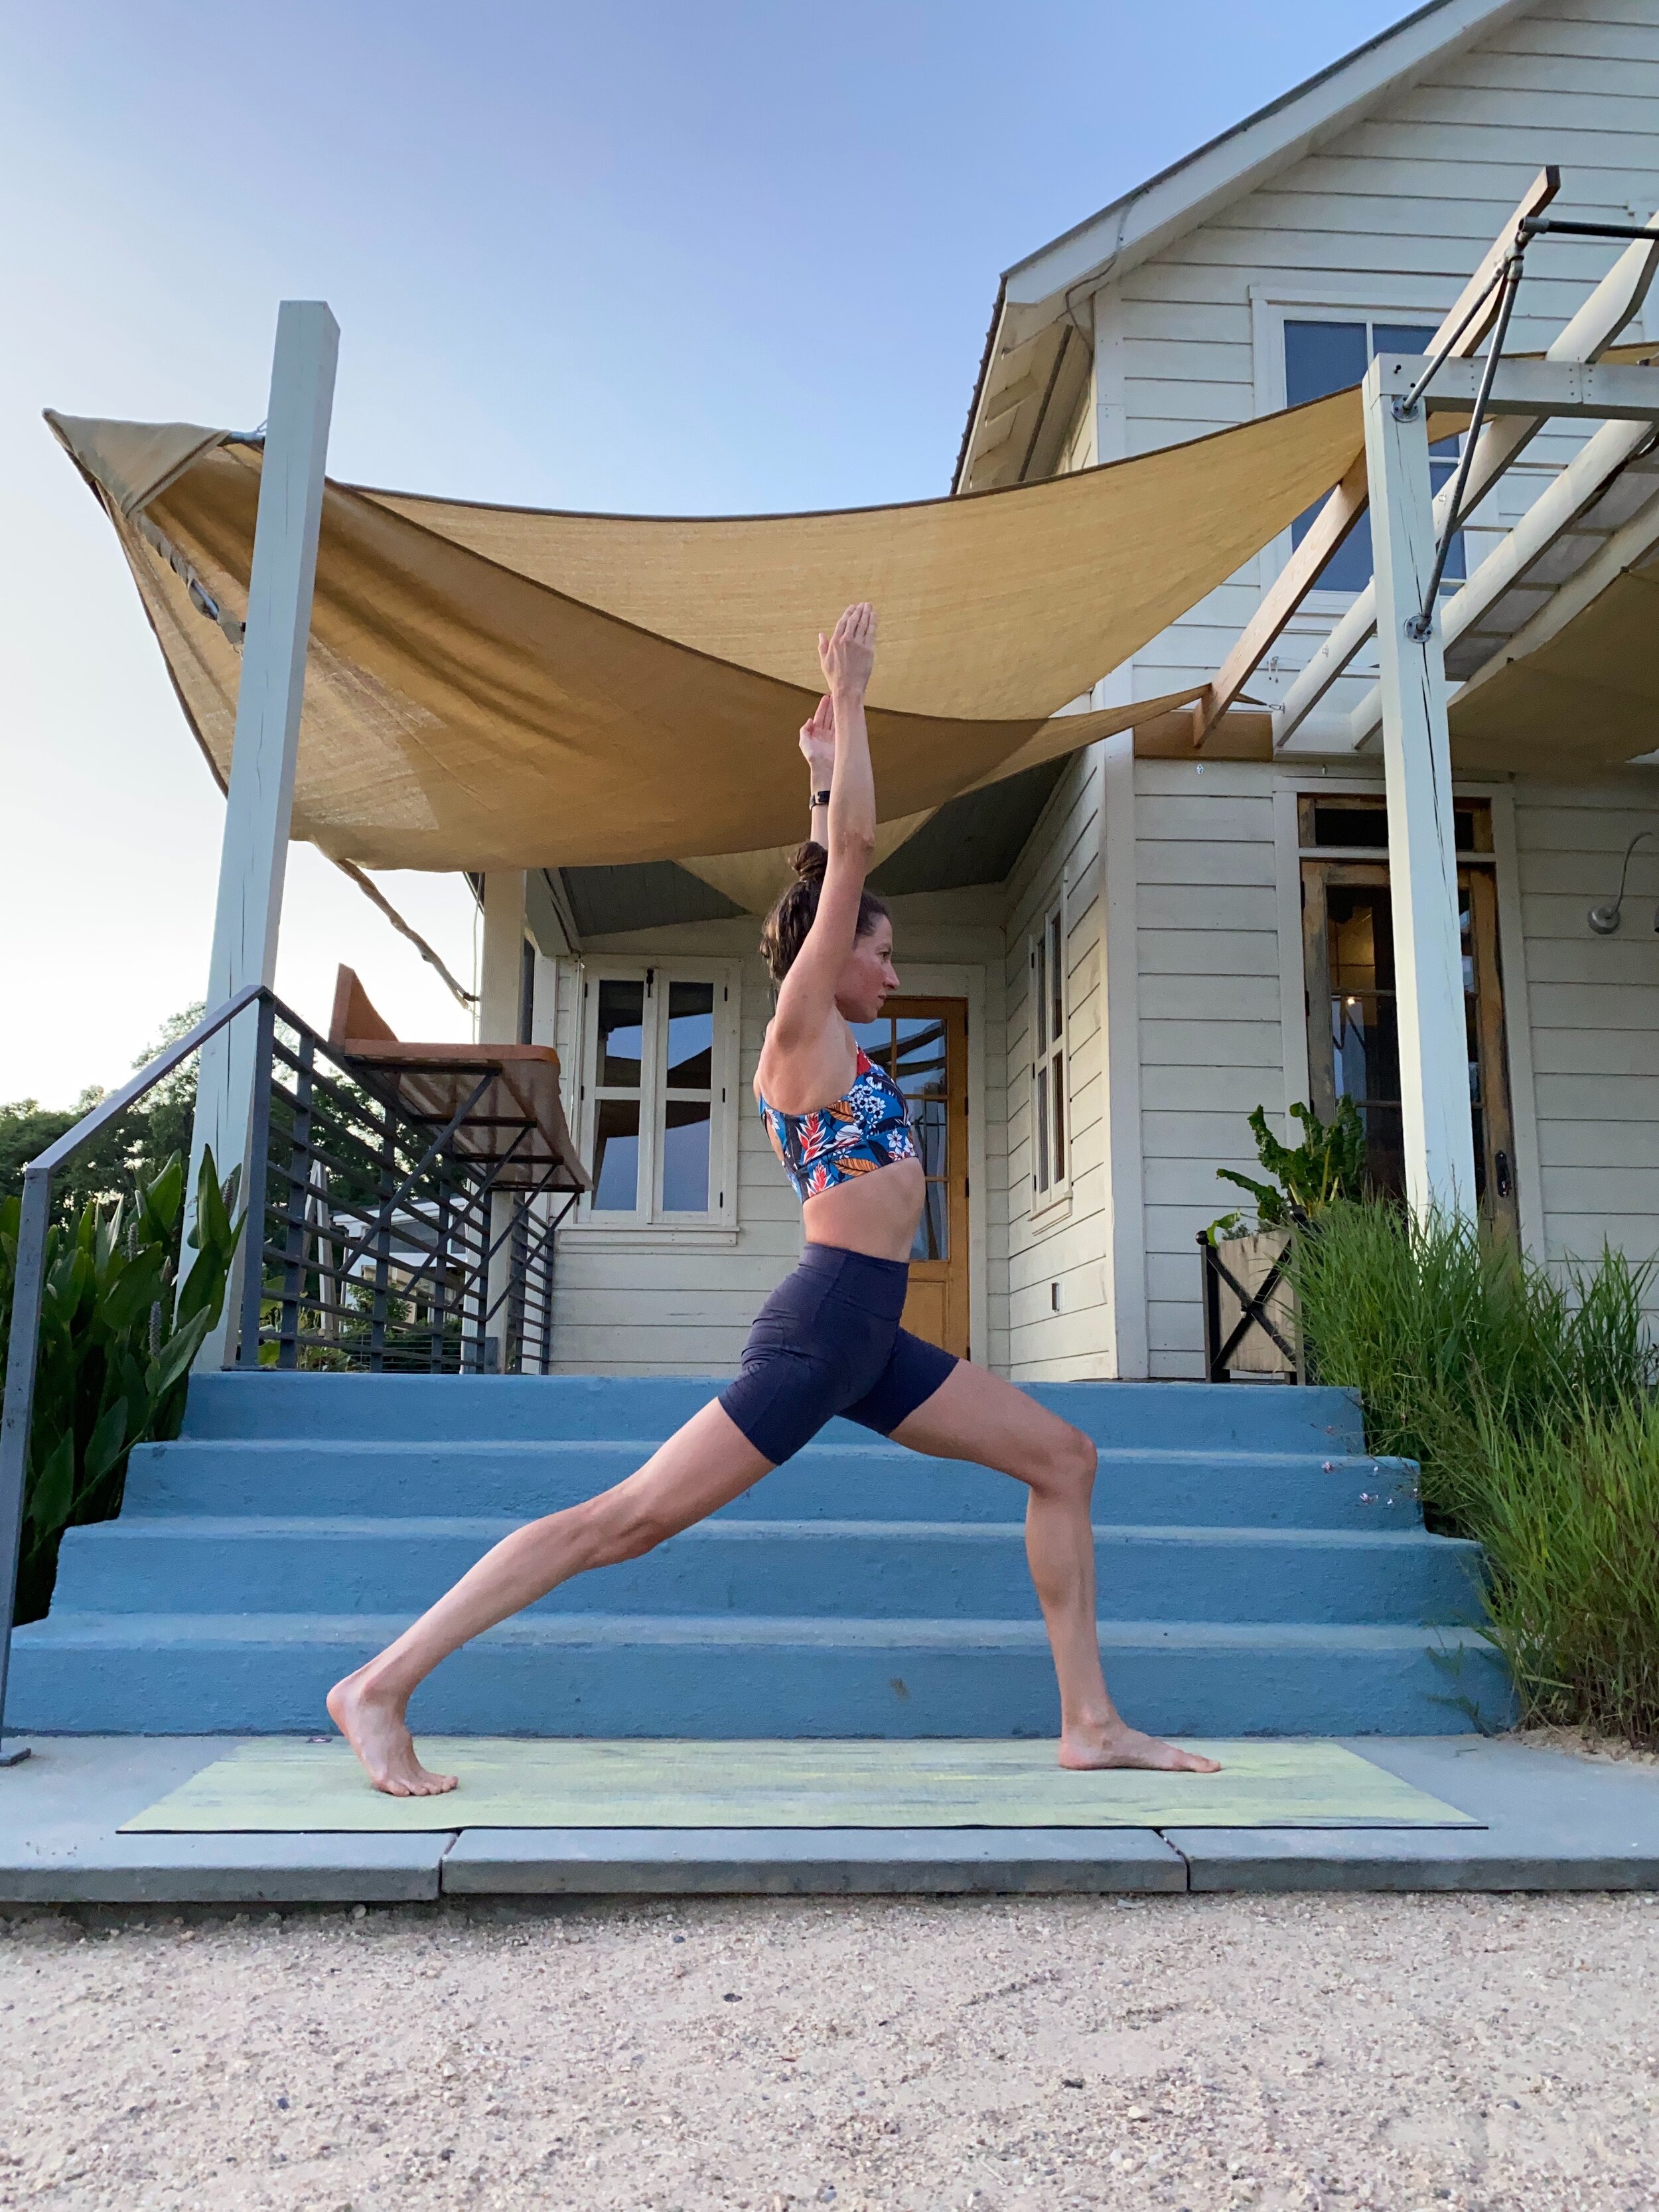
Warrior I
Front toes face forward, back foot is angled out at about 45 degrees still with toes in the forward direction.
Press the outside edge of your back foot down (this helps you get way more into your back calf and energetically stretch down the whole back of your back leg!).
Hips square towards the front of the mat (this is especially helpful for the back leg hip, which tends to want to drift backwards).
Remember that you can make little adjustments to make the pose work for your body: the most common two helpful ones here are to step the back foot a little wider (more towards that side of the mat, towards the same edge nearer to that back leg) and to have a less intense bend through the front knee. Both of these in general help anybody with more sensitive knees or knee issues.
Above, left photo demos a standard Warrior I, while the right photo shows hands in reverse prayer with an added slight backbend. Warrior I is considered to be perhaps the most fundamental standing yoga pose, but it also offers a lot of variety in what you can add with hand and arm variations, whether you take reverse prayer hands, clasp palms behind you and reach them back, do “goal post” arms or “eagle pose” arms.
For more practice, try out “Flow #95: Warrior I” coming out on Friday Jan. 28, 2022 as part of the ongoing Friday Flow series released every Friday at Runners Love Yoga TV. Every Friday has a different theme and focus!

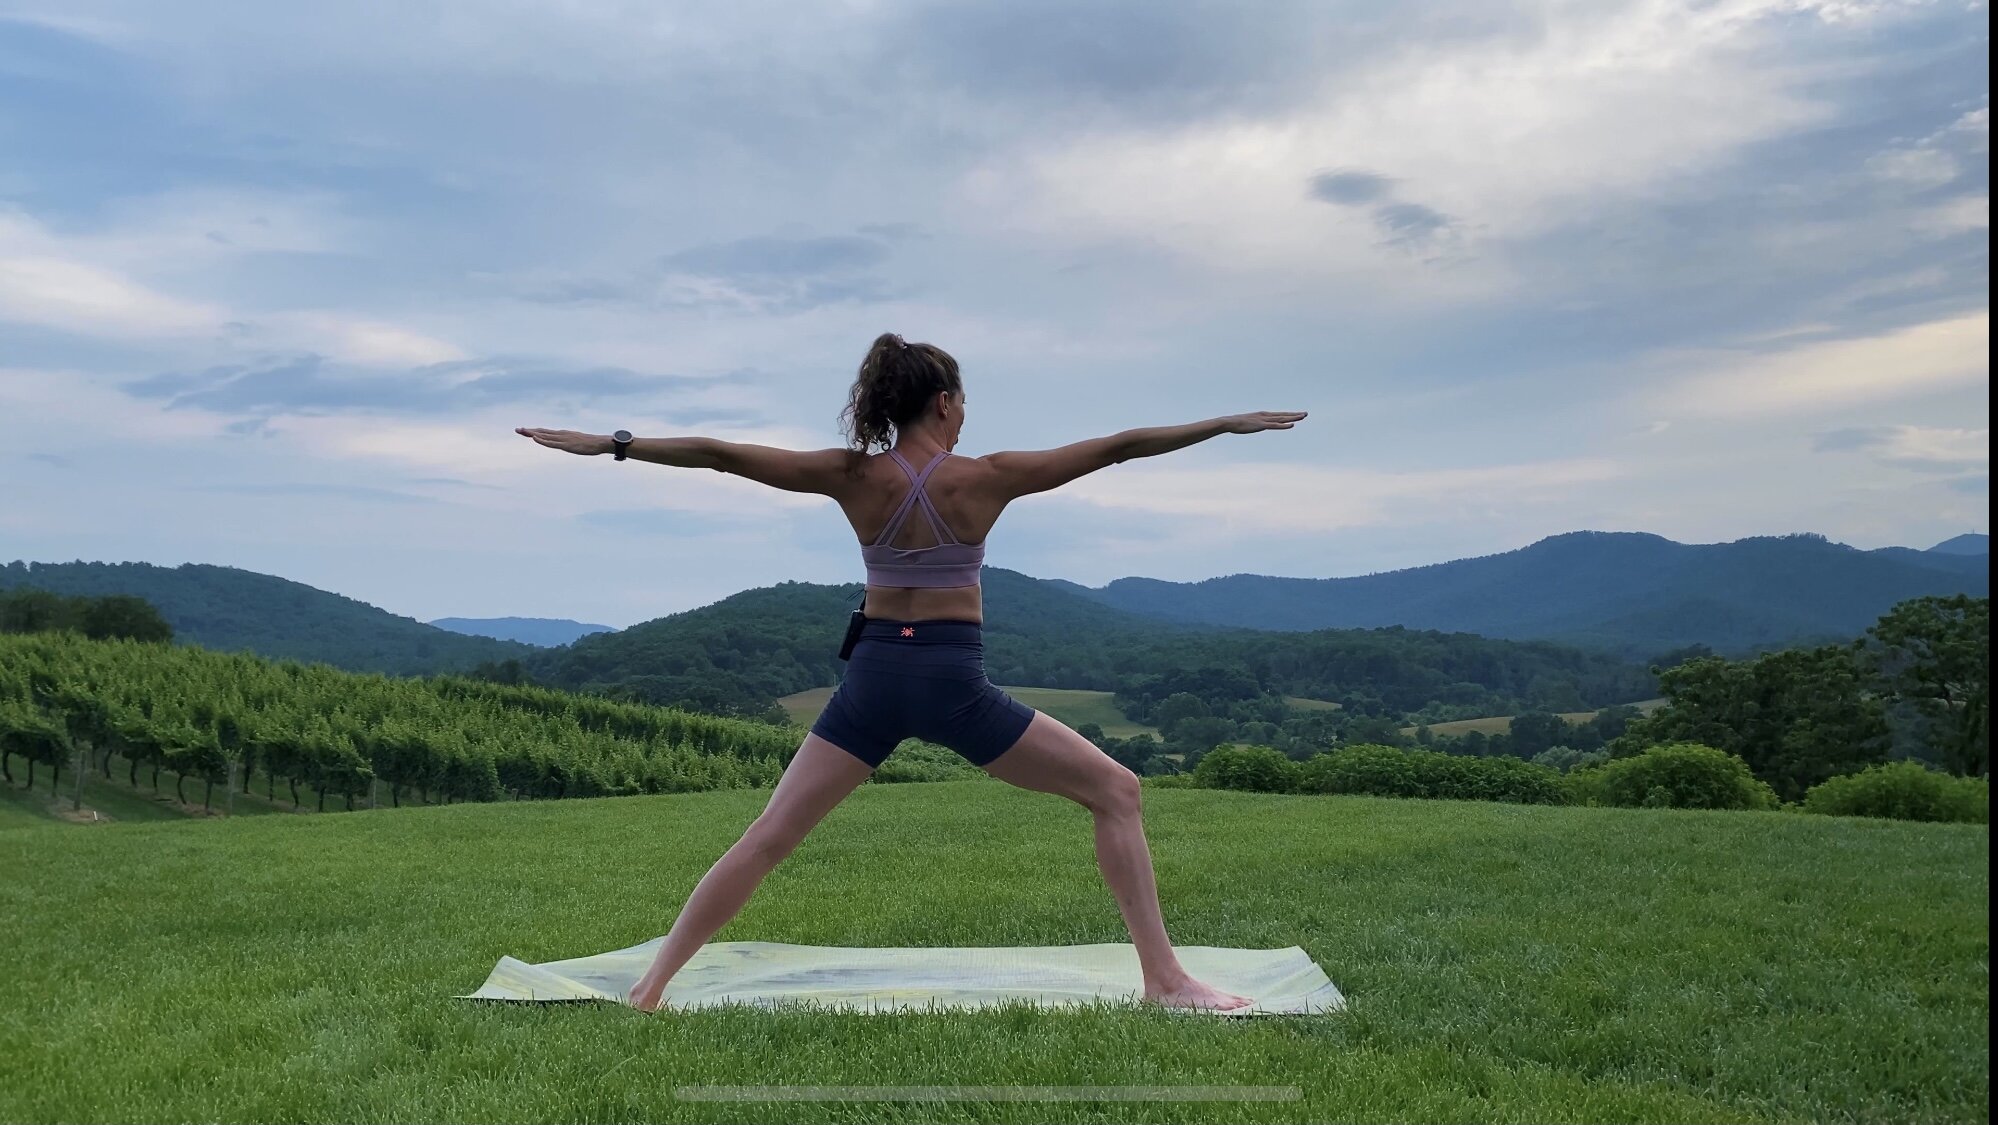
Warrior II
Hips square to the side of the mat that you are facing.
Front foot is in the same position as Warrior I.
Be sure back foot is pointed at least a little bit forwards (you just really want to avoid that foot being pointed back in any way as that is bad news for the back knee!). So, typically from Warrior I to Warrior II, your back foot does adjust open slightly, from about a 45 degree angle pointed forward to an approximately 60 degree angle pointed forward. (This is also a knee safety issue!)
Reach to ends of your fingers, both through front and your back arm. Gaze over front fingertips.
For more practice: try out “Flow #79: Warrior II for Leg and Arm Strength” being released on Fri. Oct. 3, 2021 at runnersloveyoga.tv.
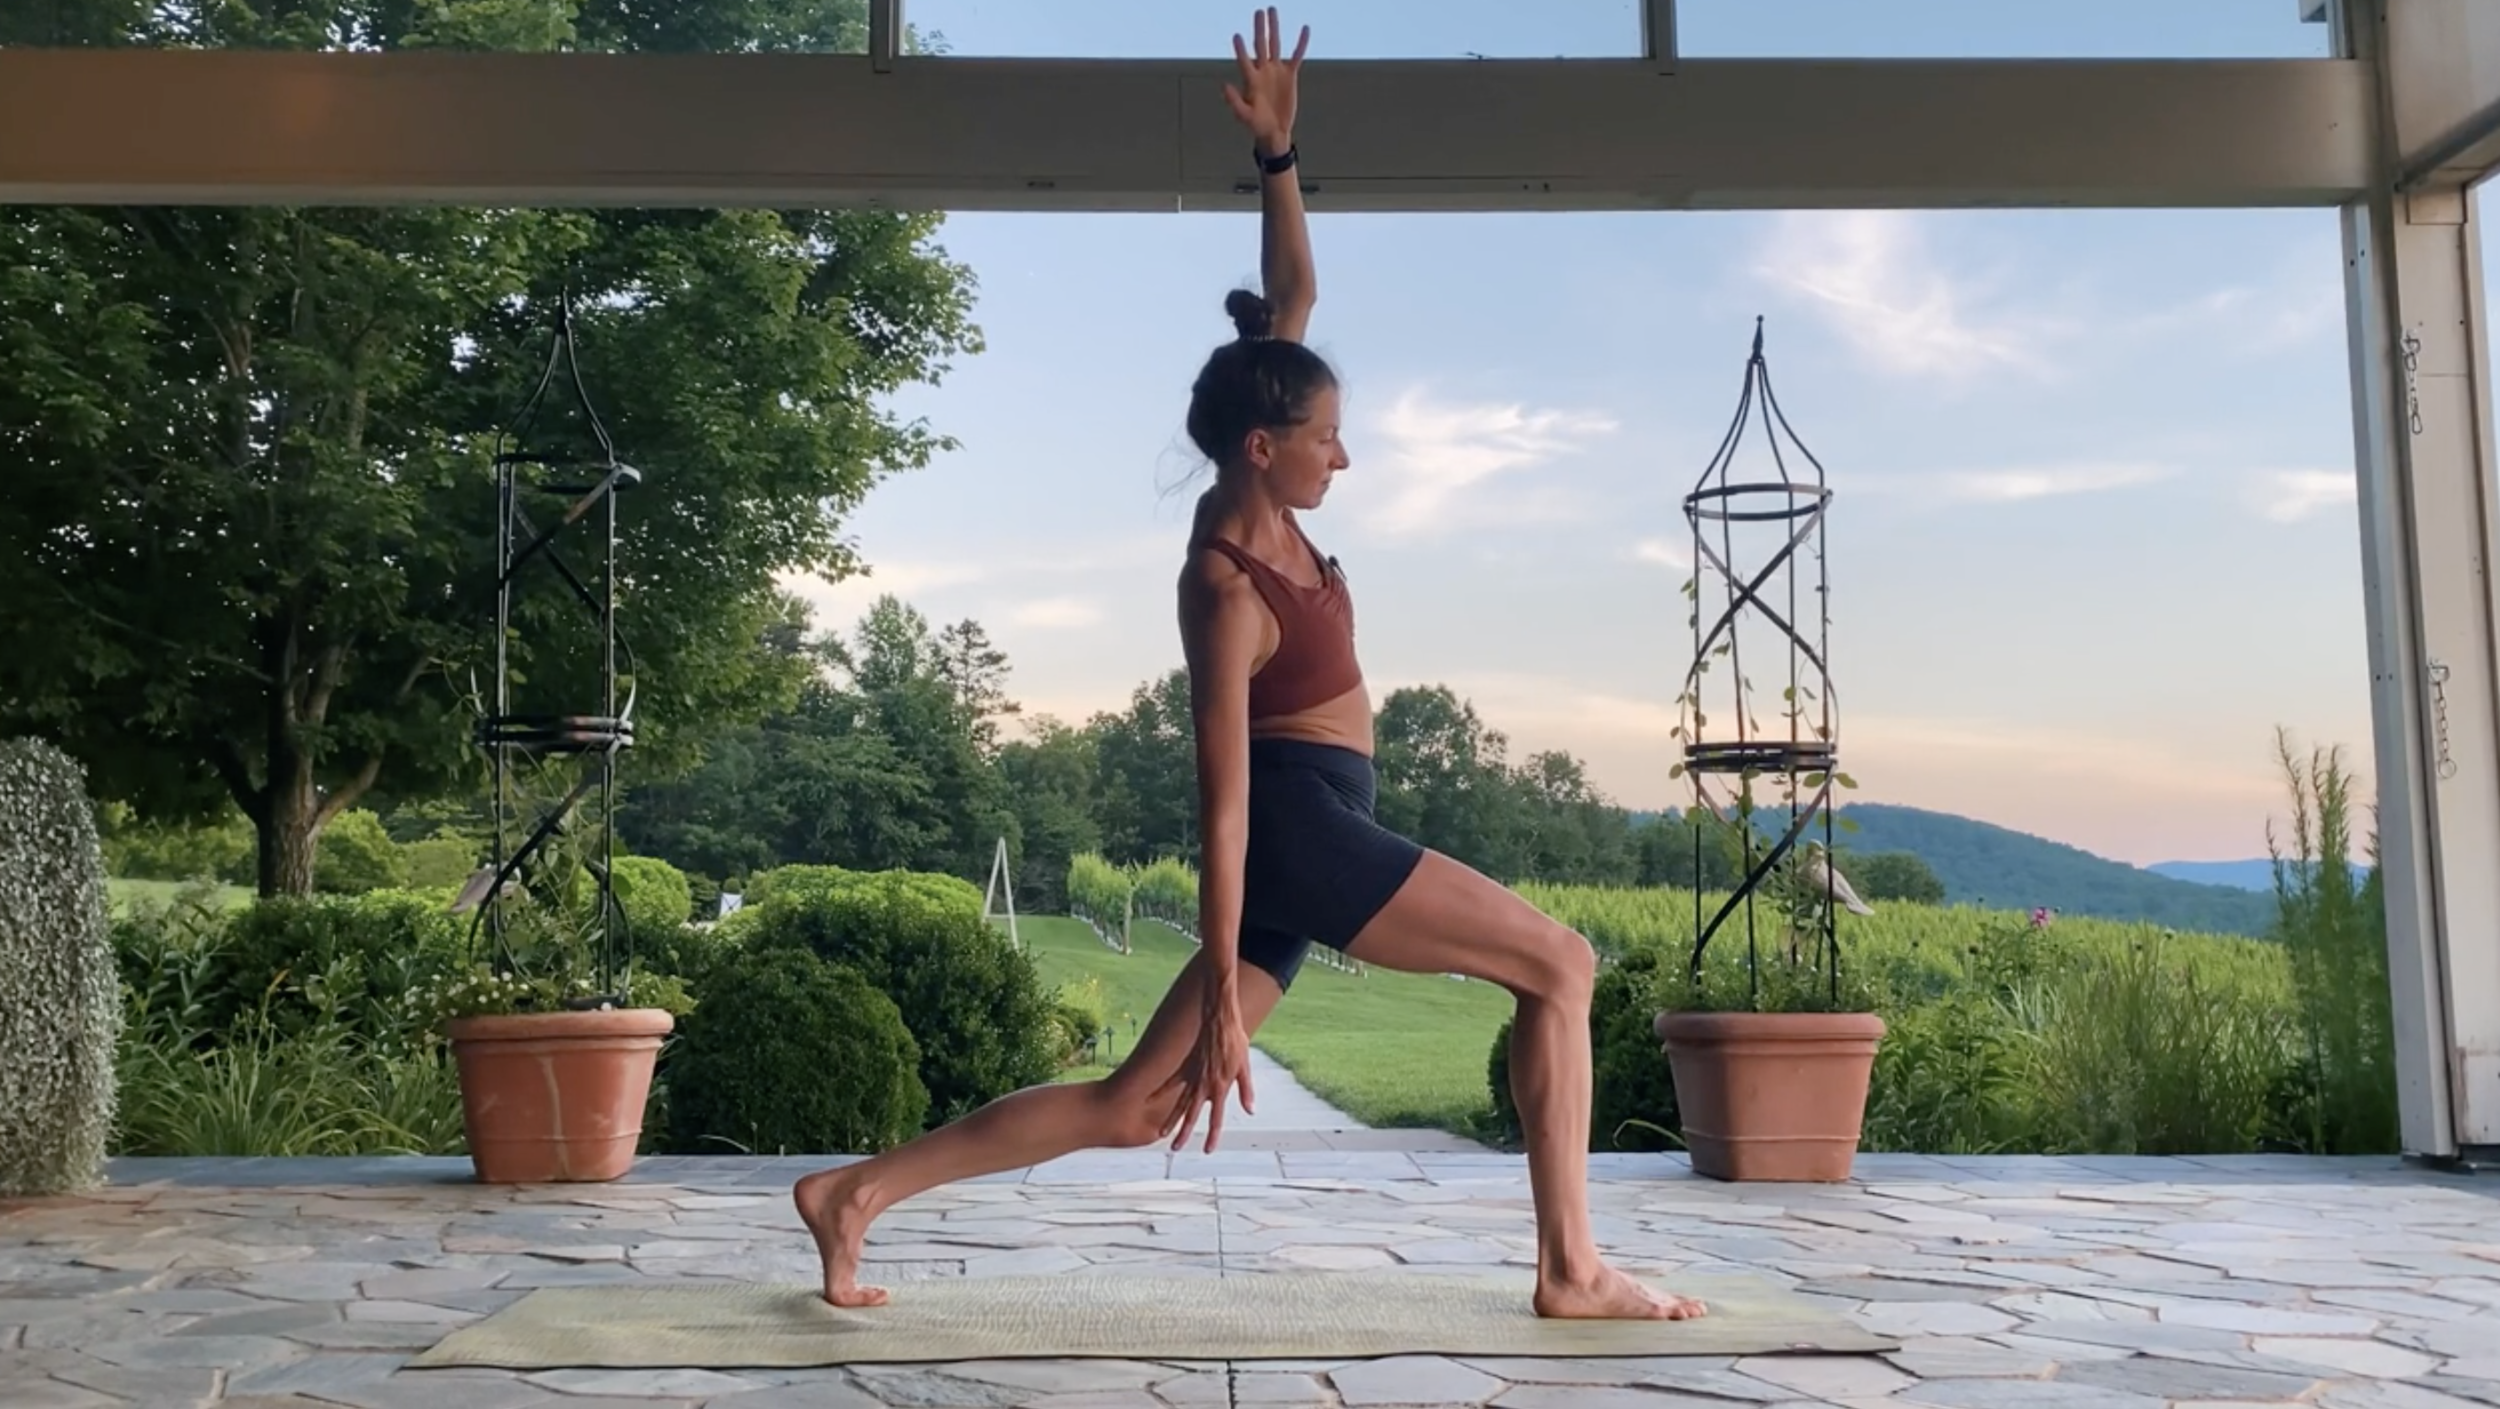
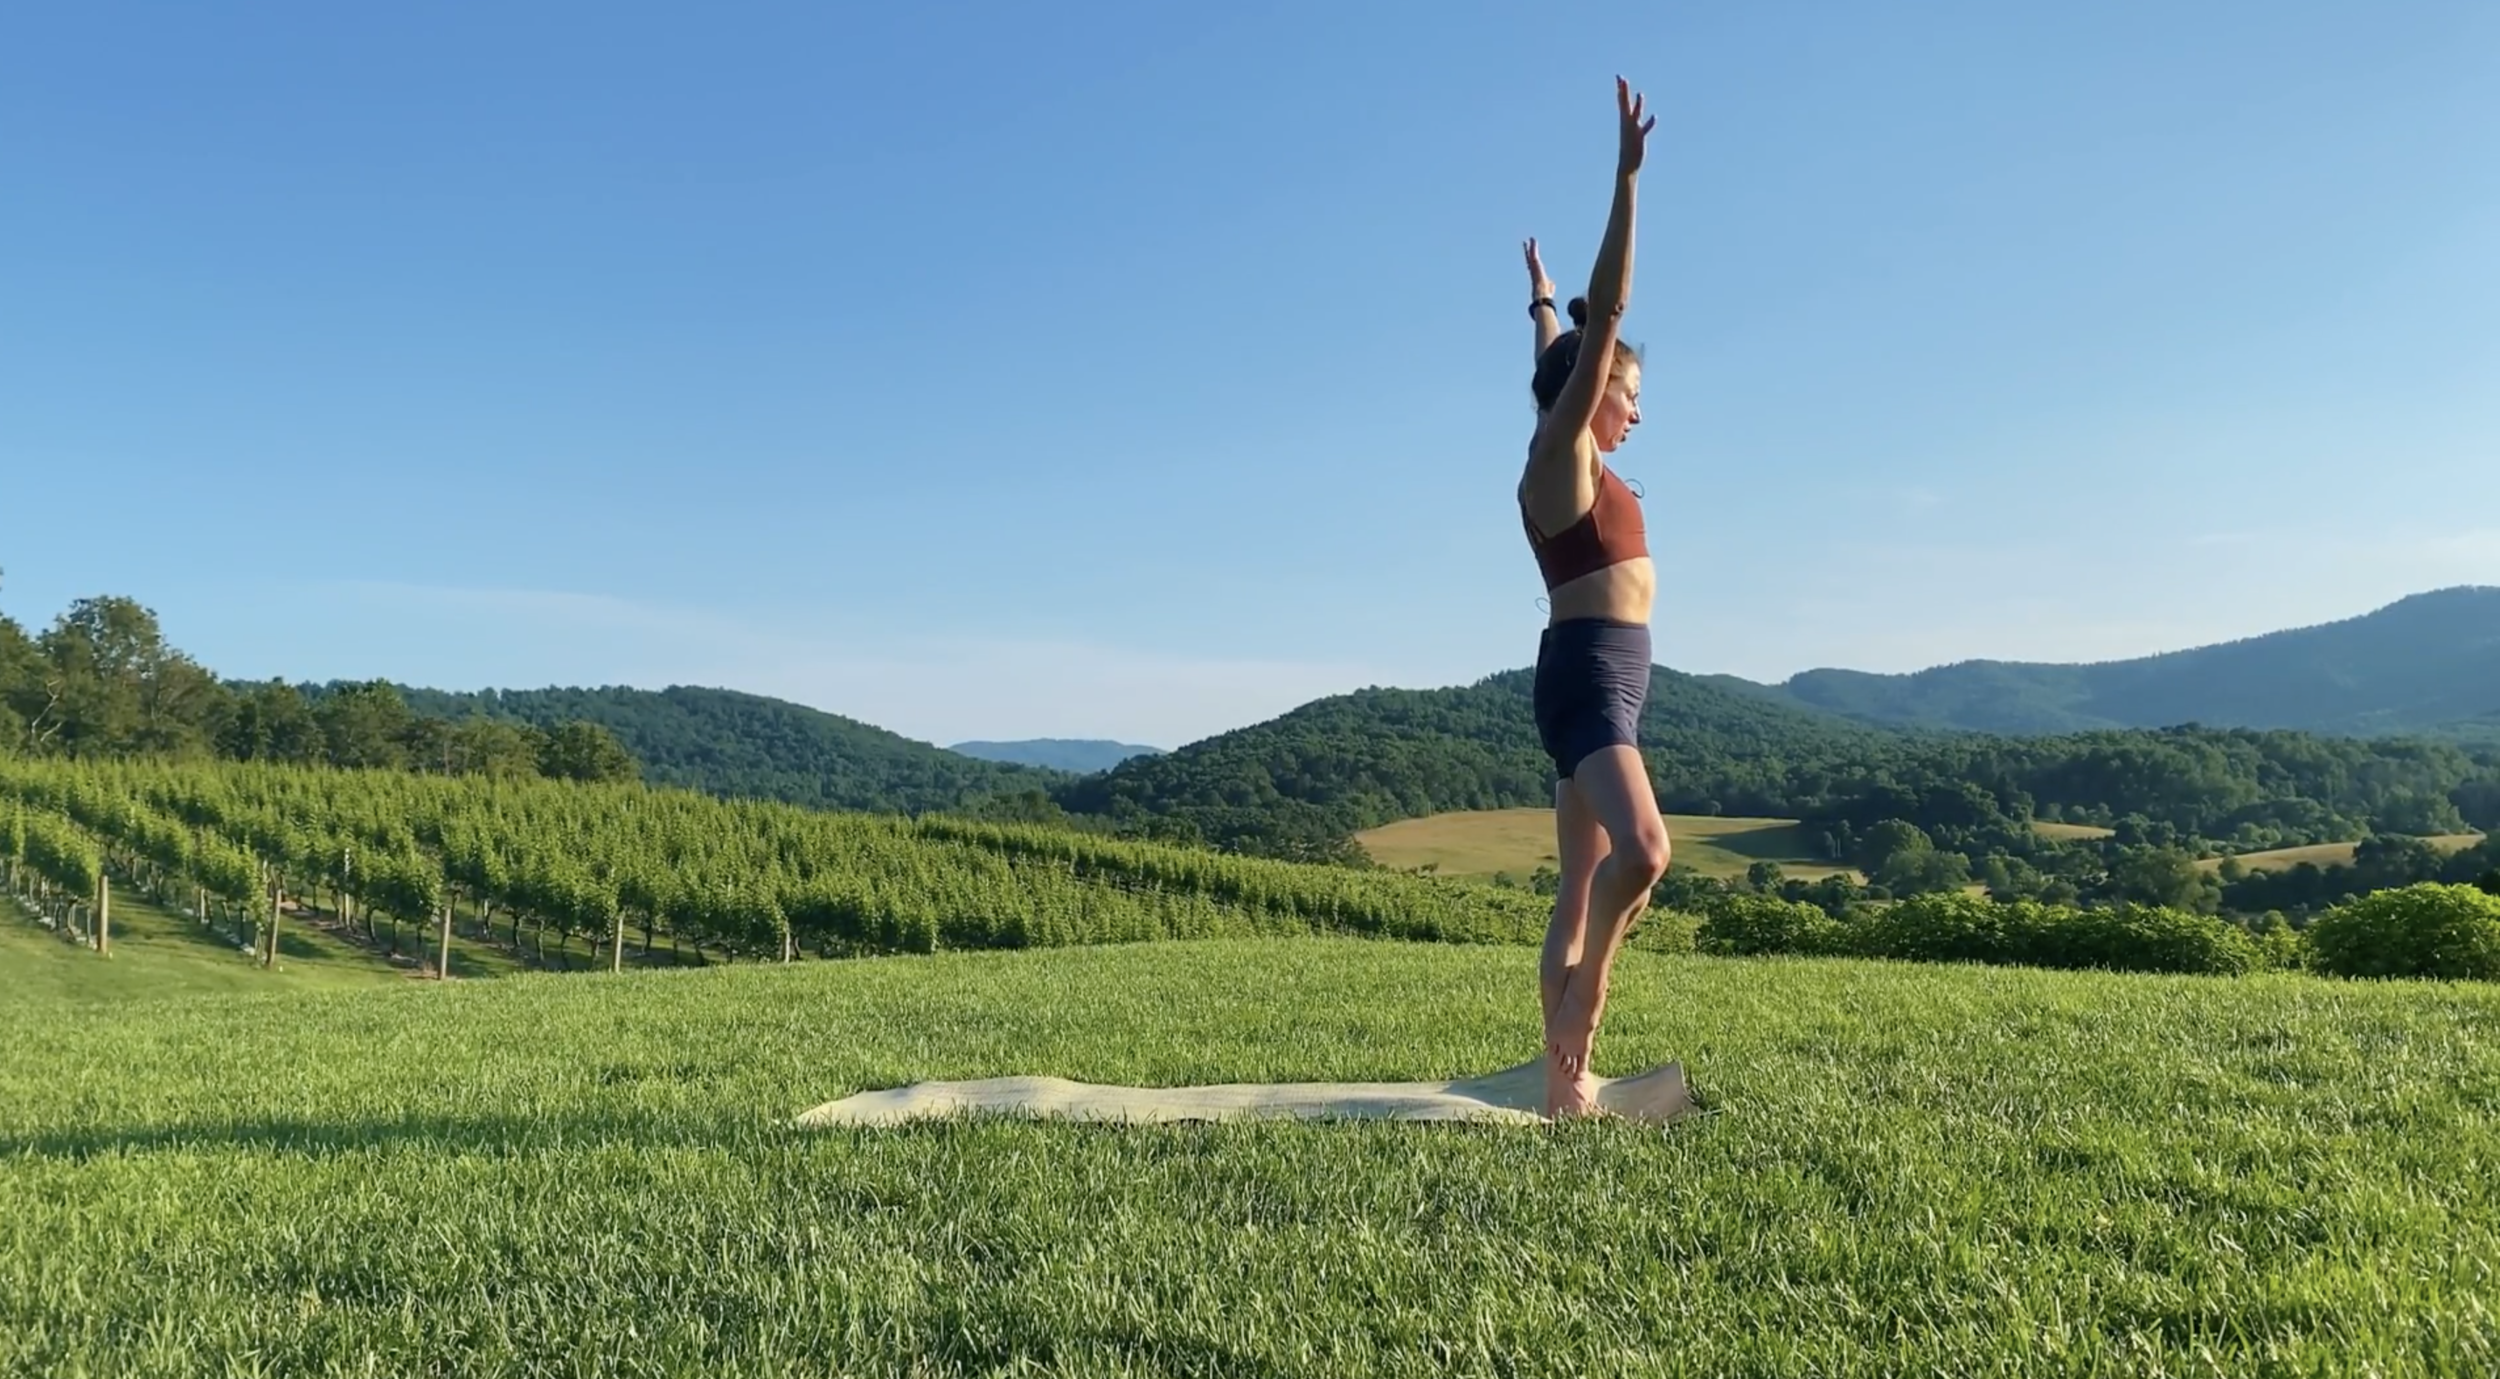
High Lunge
Reach through the back heel. This keeps the back leg strong and helps activate all the muscles there to keep you stable and balanced in this pose.
Experiment with gently pressing front of your back leg hip forward. This can get some very useful places through front of your hip.
Legs are hip-width apart. (Versus the “balance beam” of Warrior I, here you can imagine that you are on skis!)
Above, left photo demos a standard high lunge through the legs, with arms reaching overhead. Typically, arms either reach up or you keep your hands in prayer in front of you for extra balance. Above, right photo captures a moment mid-flow centered around high lunge: in this movement, you drop the back knee slightly until you get a quad stretch, while the arm on the same side reaches up and over to increase the left hip stretch and side stretch. So, keep in mind that high lunge as a pose usually looks more like the left, but there are a ton of movements and variations that may have you slightly bending back knee or taking other options! Once you feel more comfortable with how a “static” high lunge feels, it gives you more opportunity to comfortable play around with a high lunge with little or large movements! (“Static” is in quotes because you may look still, but there are always subtle little movements happening—you are thinking of reaching through the back heel, or being steady through the front leg, for instance.)
For more practice: try out Flow #20: Lunge Pose, or Flow #56: Lunge Pose!
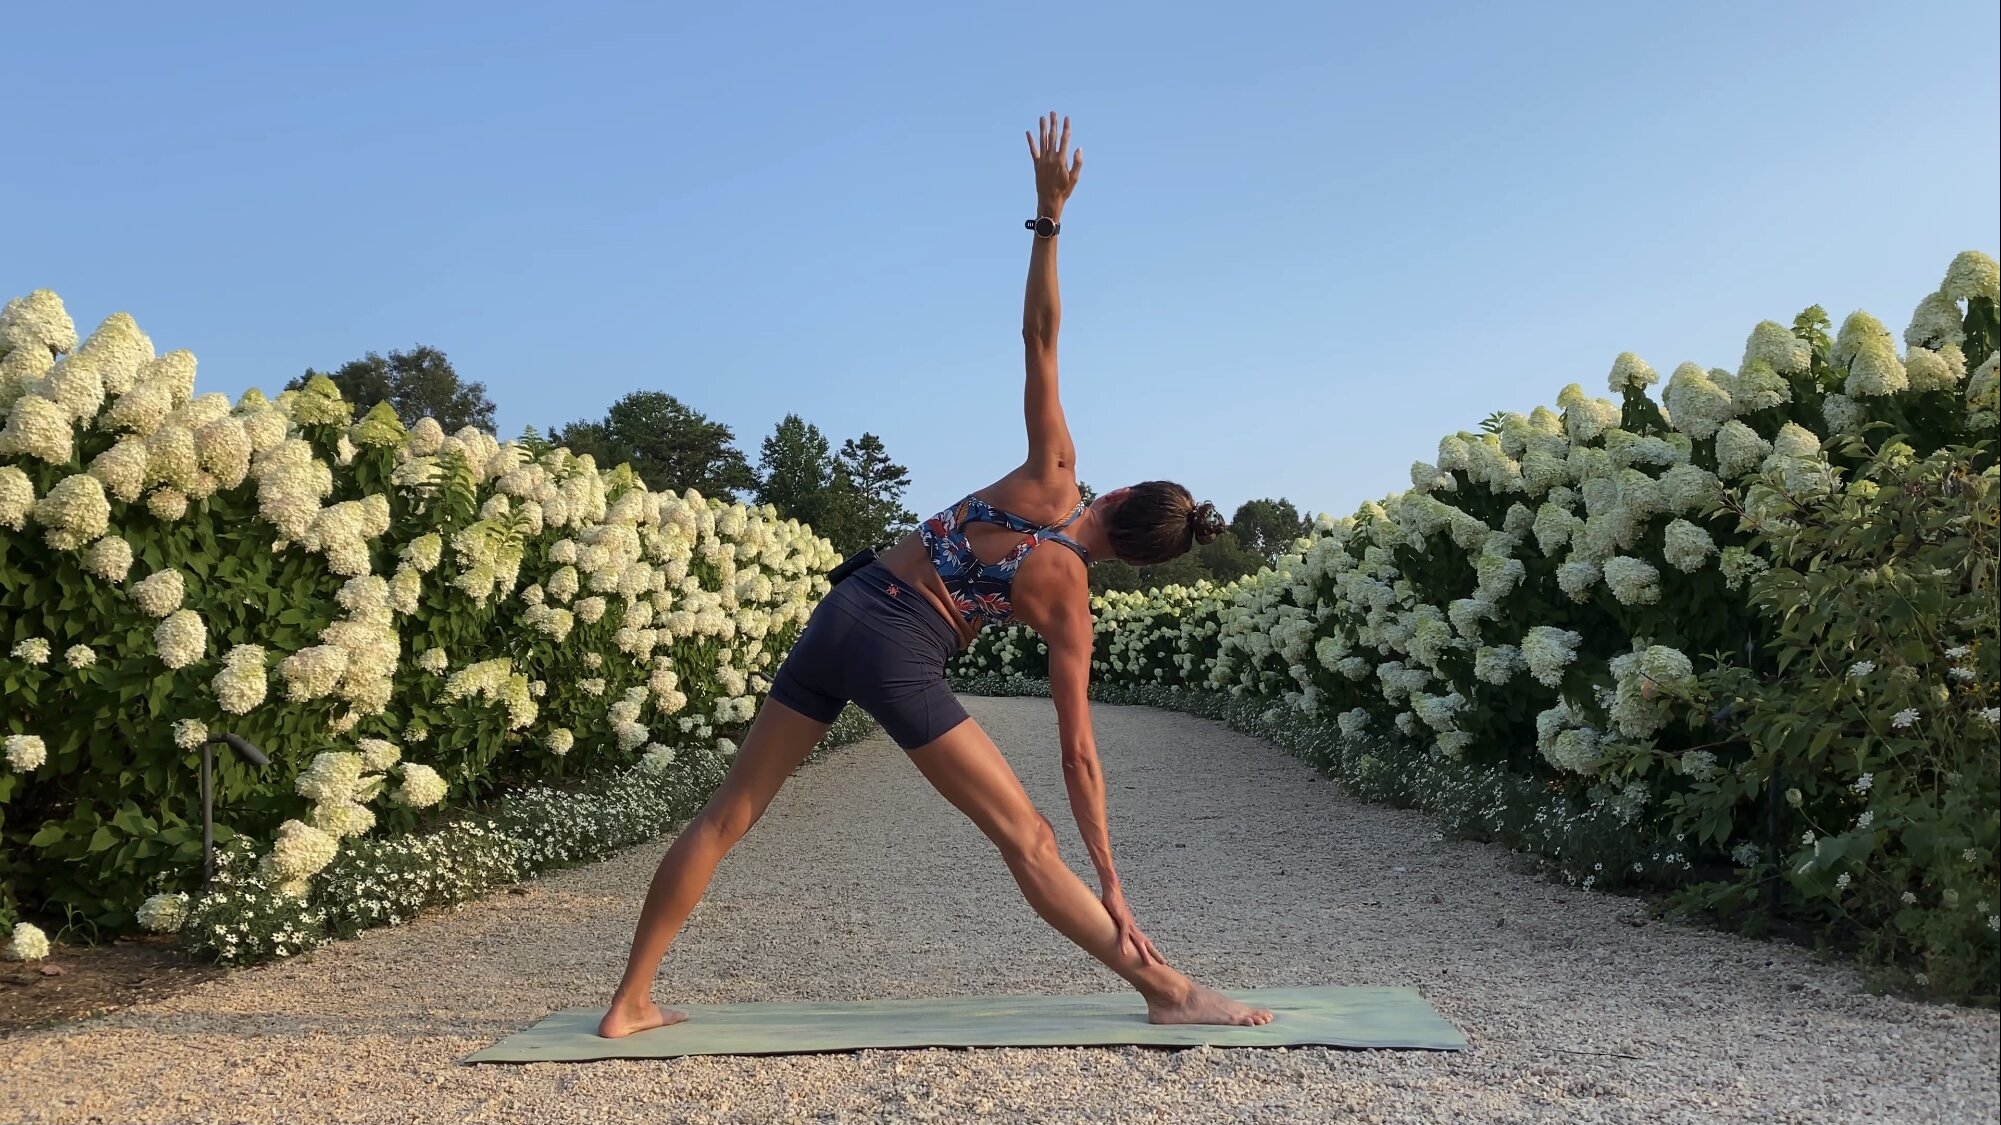

Triangle
reach through the top arm and fingers to keep your entire pose more energized and strong
experiment with where you place your bottom arm; having the bottom hand lower on the leg is a deeper version of the pose, but you might be surprised where you feel the stretch through your top hip and leg if you slide that bottom hand up a few inches!
For more practice: try out Flow #44: Revolved Triangle, or Flow #58: Triangle Pose, or Flow #96: Triangle Pose for Rejuvenation (coming Fri. Feb. 4, 2022).
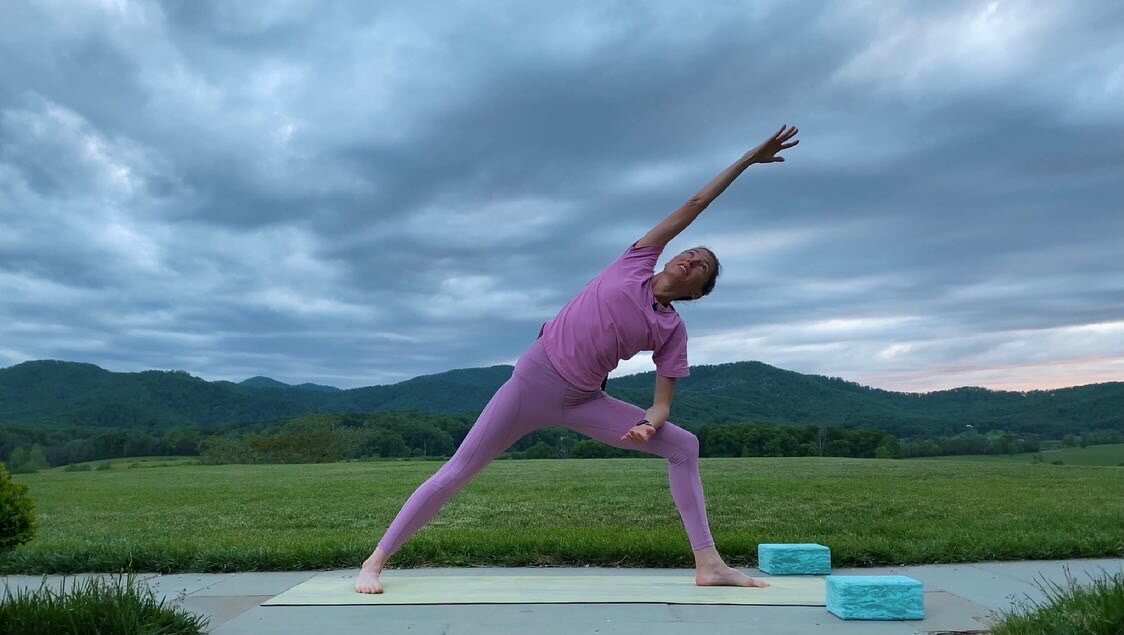
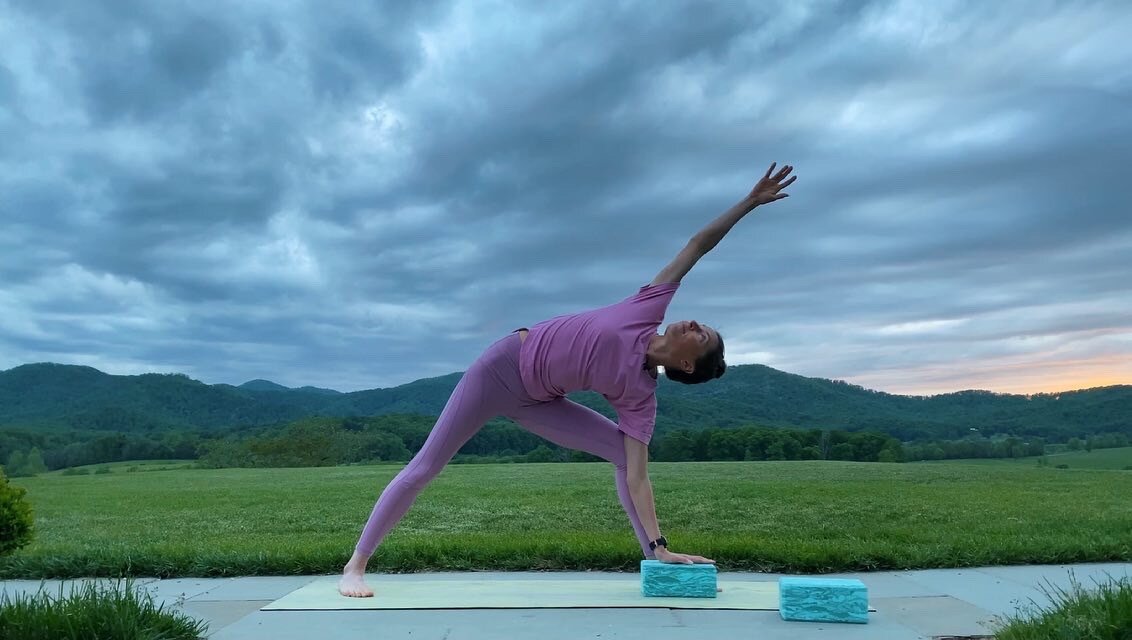
Extended Side Angle
just like triangle pose, you get a lot out of making that top arm active and reaching to ends of the fingers, rather than dumping all of your body weight into that bottom forearm. This is especially true if you are taking the option with forearm on front thigh rather than bottom palm placed to the inside of your front leg.
if you are doing the version with palm on the ground, gently press bottom arm to leg, leg into arm to get a deeper hip stretch.
For more practice: try out: Flow #21: Extended Side Angle, or Flow #61: Extended Side Angle to Help Your Hips.
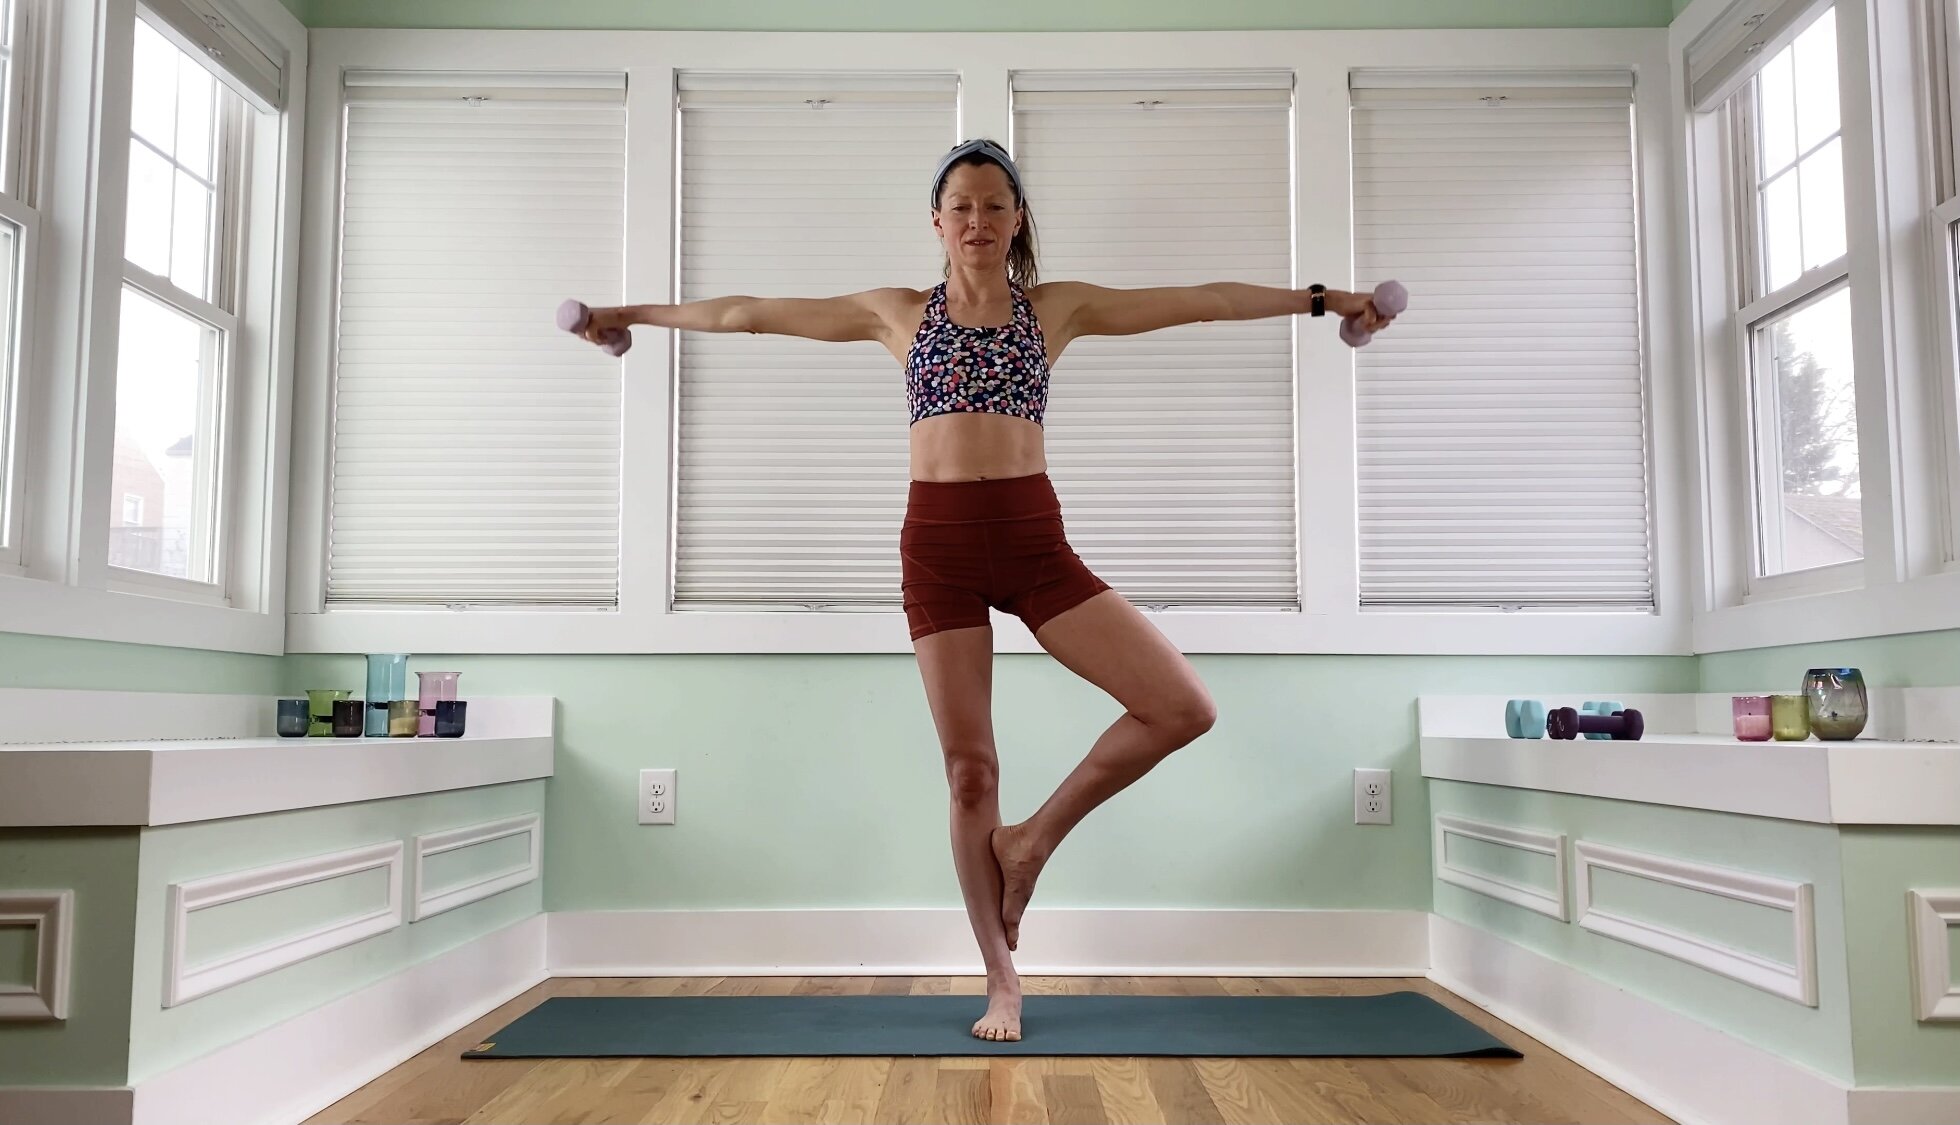
Tree Pose
Check out what your rooted leg knee is up to: you want this knee going towards the side best you can rather than allowing it to drift forward (tree is also a hip opener!).
When you plant sole of your foot on your shin or upper thigh, try to avoid planting sole of foot on your knee. It just probably won’t like that very much over time!
Above, left photo captures a shot mid-movement from the 16 class series Yoga for Strength & Stability which integrates hand weights into the yoga sequencing in every other class—tree pose is one yoga pose particularly conducive to adding weights! Shown in the photo is a still from Strength & Stability #8: Single Leg Deadlifts, Dumbbell Raises, and Hips” but you can find all 16 of these classes in this series HERE. Above, right photo demos a tree pose at the front of the mat. As a teacher, I often use tree to transition into other standing poses like Warrior I: you just step back from where you were at tree at the front of your mat! Note that both of these photos show a low-rooted tree with sole of foot just above ankle on the lower shin. Keep in mind that even after you are comfortable in a higher rooted tree, a low rooted tree is still a helpful, just slightly different pose from high tree—and thus offers just slightly different, worthwhile benefits!—and worth keeping as part of your practice!
For more practice: try out “Flow #19: Tree Pose” or Flow #62: Twisted Tree Pose.
In general, you may have noticed a few themes above. One of these is reaching to the ends of your fingers (or through your back heel as in High Lunge) to make the whole pose more active: this is a difference between energized and strengthening yoga and, for lack of a better adjective, “lazy” yoga. You really can transform a pose and your practice by thinking all the way to ends of your limbs. (As with everything in yoga, you absolutely don’t need to overdo this: a little bit of reaching goes a long way, and a little bit of reaching is totally different and has a ripple strengthening effect through the rest of your body versus not reaching!) By the way, if you want a whole class themed around this “reaching” theme, here is Flow #71: Reaching for Flexible Strength which you will enjoy!
A second theme here is knee safety. In particular, for tree pose, and Warrior I and II, the positioning of your feet can really affect how happy your knees are. This is more the sort of thing where you will know when it feels wrong: that is something you should listen to, but the guidelines above will go a long way towards ensuring happy, healthy yoga every time you step on your mat.
Last but not least, you should always make any little adjustments within a pose for what feels right for that day. A lot of those have to do with the knee safety/comfort point above: for example, my right knee is sometimes just wonky so I don’t go for a super deep bend through that knee in Warrior I. This just feels a lot better to me! So by all means, listen to your body and make your yoga YOUR yoga.
Listening to your body and how it feels to the ends of your limbs really is a skill that you develop over time, and I believe is one of the many useful aspects of a yoga practice for athletes. Use the key cues above to help enhance your standing practice—they may even help you to be more in tune with how little adjustments can carry you a long way to a new experience of a yoga pose!